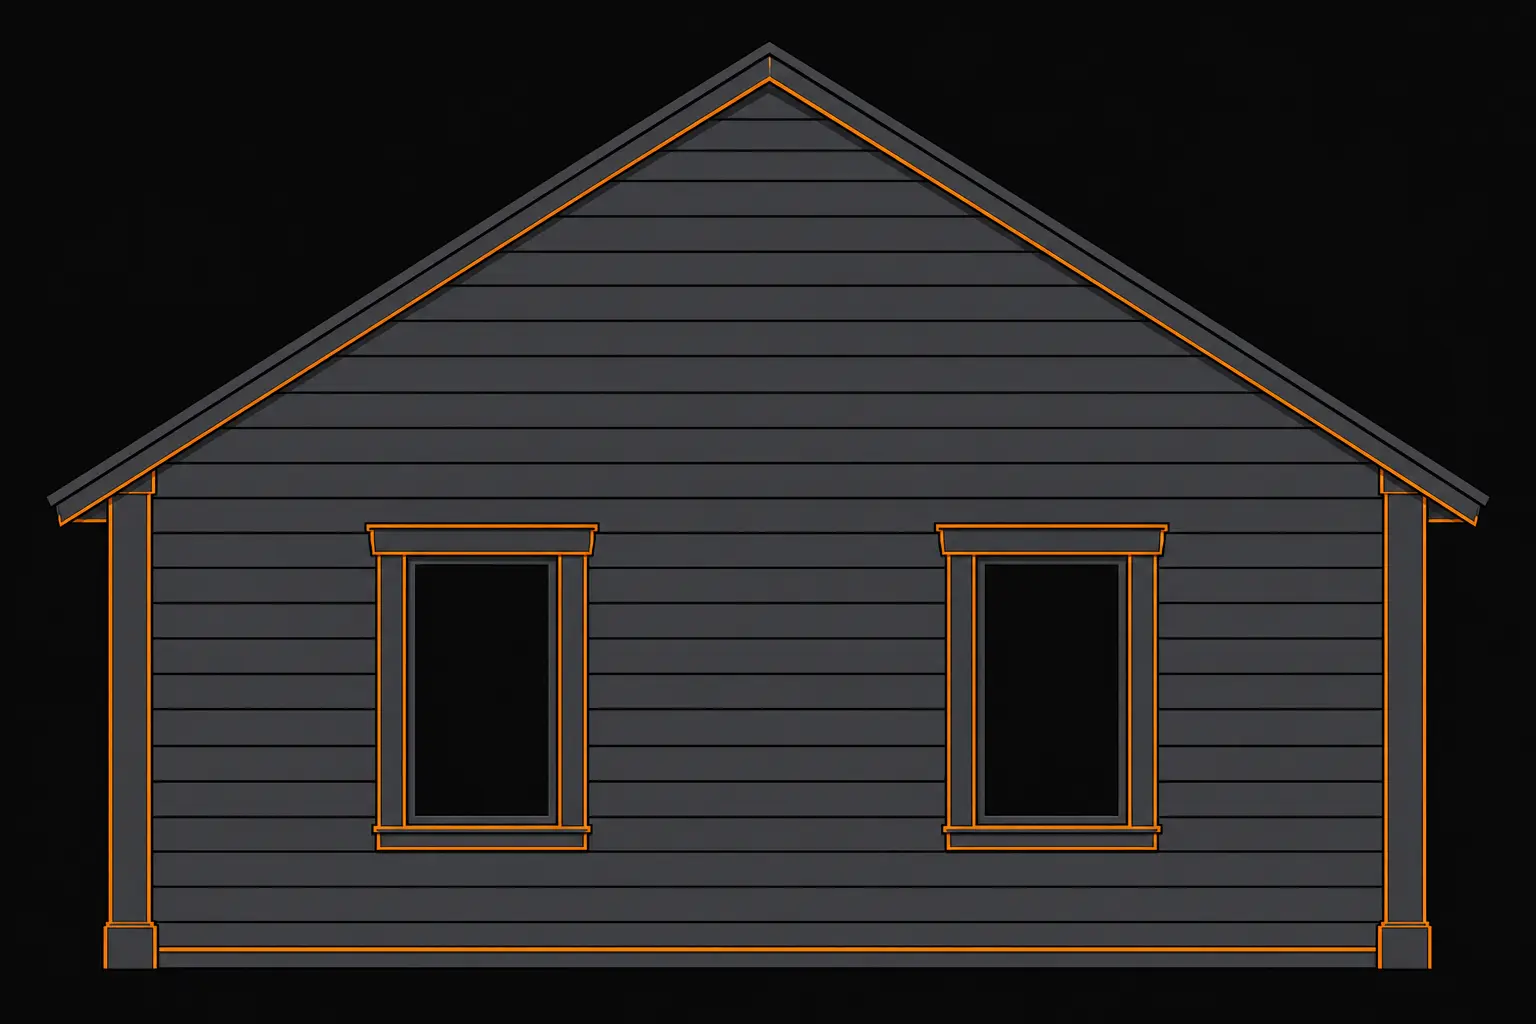
How to Do a Siding Takeoff
A siding takeoff measures every wall surface that gets siding, facet by facet (rectangular walls, triangular gables, dormer cheeks, bump-outs), converts that area into squares of 100 square feet, and then converts squares into the unit the product is sold in: cartons of vinyl, pieces of fiber cement or engineered wood, or lineal and board feet of wood. Alongside the area, it measures the linear feet of every trim and accessory line (starter, corners, J-channel or casing, undersill, frieze, rake and soffit trim) and counts the openings, penetrations and flashing points. Area buys the panels. Linear feet and counts buy everything else.
The part that makes siding different from most trades is that the area number depends on three choices the estimator makes before any arithmetic: whether to deduct openings, how to figure gables, and when to add waste. Manufacturers publish different rules for all three. ABTCO's estimating guide says not to deduct doors and windows at all and to figure each gable at 75 percent of width times height. CertainTeed's estimating form figures a gable as its center height plus one foot, times half its width, and deducts only large openings like garage doors and sliders, at half their area. Contractors writing for homeowners commonly deduct every opening and add 10 to 15 percent. On the house worked later in this guide, those three methods land at about 13, 15 and 16 squares. None is wrong. You just have to know which one you used.
The Order That Works
1. Mark what gets siding. Go elevation by elevation and outline the sided surfaces. Brick or stone wainscots, stucco gables, board and batten accent walls and shake gables are separate products with separate takeoffs. A mixed-material elevation is the most common place for a takeoff to double count or skip area.
2. Break every elevation into rectangles and triangles. Measure walls to the eave line (not the roof peak), gables from the eave line to the peak, and dormer cheeks as triangles. ABTCO's guide recommends rounding each dimension up to the next 3 inch increment so the arithmetic stays in decimal feet (10 ft 1 in becomes 10.25 ft).
3. Measure each facet by product and exposure. A house with 7 inch lap on the walls and shakes in the gables is two takeoffs.
4. Record the openings separately, size by size, whether or not you end up deducting them. You need them for the trim takeoff anyway.
5. Pick your opening, gable and waste rules on purpose, and write them on the takeoff.
6. Convert squares to pieces with the coverage for that product and exposure, not a generic number.
7. Take off the trim and accessories by linear foot, then the housewrap, flashing and fasteners.
What a Square Is
A square is 100 square feet, the same unit roofers use. Siding is priced by the square at the supply house, installed by the square on the labor side, and ordered in cartons or bundles that hold a set number of squares. The trap is that all three of those "squares" can be counted differently, which is the next section.
Wall Squares, Material Squares and Billing Squares
When a builder on the JLC forums asked why his siding bids came back with very different square counts on the same house, one veteran contributor's answer was that everyone calculates siding differently. That is true, but the differences are not random. There are three different things people call a square, and most arguments about siding quantities are two people using two of them.
| Kind of square | What it counts | Who uses it |
|---|---|---|
| Wall square | 100 SF of wall surface, measured by some rule for openings and gables | The takeoff, the energy and code people, you |
| Material square | Enough product to cover 100 SF of wall at its exposure, with no waste | The supply house, the carton label, the coverage chart |
| Billing square | Whatever the installer and the GC agree to pay by | The labor side of a sub bid |
Wall Squares
This is the one you measure. The honest version is net area: every sided surface, minus the openings. The practical version most estimators use is some mix of gross area, partial deductions and a gable rule, because opening deductions and gable waste partly cancel out. Whatever version you use, it should be the same version every time, so your waste factor and your historical numbers mean something.
Material Squares
A square of material is defined by its exposure, the face that shows after the lap. Supply houses and manufacturers quote and pack by the square of coverage, not by the square of product. A carton of Double 4 vinyl, 24 panels at 12 ft 6 in, is labeled 2 squares because each panel shows 8 inches over 12.5 feet: 8.33 SF of wall per panel, times 24, is 200 SF. The overlap is already accounted for.
That matters when you change products. On the JLC thread, the arithmetic for 8-1/4 inch fiber cement at a 7 inch exposure came out to 142.86 twelve-foot planks for 10 squares with zero waste, which matches the Hardie coverage chart figure of 143 quoted in the same thread. If someone swaps to a 6-1/4 inch plank at 5 inch exposure, the same wall takes 40 percent more pieces. The wall square did not change. The material square did.
Billing Squares
This is the one that causes fights. On a ContractorTalk thread, a siding salesman described an installer who measured every face separately, rounded each face up to the next full square, and figured gables as rectangles, then got paid by the squares he ordered. His counts ran 2 to 4 squares over the salesman's on every house. Whether that is padding or fair compensation for the extra labor of cutting gables and openings is a negotiation, and a reasonable one. JLC contributors made the same point from the other side: less siding on a house with a lot of openings does not mean less labor, because the trim work around those openings is the slow part.
The fix is not to fight about it. Put the measuring rule in the subcontract: "billing squares are gross wall area, openings not deducted, gables at true triangle area" or whatever you agree to. Then your material takeoff and the installer's invoice can be different numbers on purpose, and both are checkable.
Gables, Dormers and Openings: Where the Methods Split
A gable is a triangle, so its area is half the base times the height. The problem is that you cannot buy a triangle of siding. Every course in a gable ends in two angle cuts, and the piece that falls off one side only sometimes fits the other. So every published method adds something to the gable, and they add very different amounts.
Gable Rules Compared
Take a 28 ft wide gable end with a 6 in 12 roof. The run is half the width, 14 ft, and the rise at the peak is 14 x 6/12 = 7 ft.
| Method | Formula | Area on the example | Over true area |
|---|---|---|---|
| True triangle | width x height / 2 | 28 x 7 / 2 = 98 SF | 0% |
| CertainTeed estimating form | (center height + 1 ft) x half width | (7 + 1) x 14 = 112 SF | +14% |
| "True area plus a third" (forum rule) | true x 1.33 | 130 SF | +33% |
| ABTCO estimating guide | width x height x 0.75 | 28 x 7 x 0.75 = 147 SF | +50% |
| Measured as a rectangle | width x height | 28 x 7 = 196 SF | +100% |
The CertainTeed rule adds one course or so of height across the whole triangle, which is modest and scales with the gable size. The ABTCO rule says in plain words that the 0.75 multiplier is "to allow for waste in cutting along the rake," and it assumes you did not deduct any openings either, so it is meant to be generous. Measuring a gable as a rectangle doubles it, and that is the rule behind many of the inflated square counts contractors complain about.
What should you use? For a steep, tall gable with long rake cuts and short pieces at the peak, the true area undercounts badly. For a low-slope gable on a long wall, the ABTCO rule overbuys. A reasonable approach is to take the true triangle area into the takeoff, record it separately from the walls, and give gables their own, higher waste factor. That keeps the measurement honest and puts the judgment in one visible place.
Dormers
A dormer cheek (the triangular side wall) is a small right triangle: dormer wall height times its depth, divided by 2, times 2 for the two sides. CertainTeed's form adds a foot to the height here too, and ABTCO's multiplies by 0.75 instead of 0.5. Dormer cheeks are small but they eat material out of proportion to their area, because nearly every piece is an angle cut. The dormer face is a regular rectangle plus its own small gable.
Openings: Deduct, Partly Deduct, or Ignore
| Approach | Source | What it assumes |
|---|---|---|
| Do not deduct any openings | ABTCO estimating guide | The opening area covers cutting waste, so no waste factor is added |
| Deduct only large openings, at 50% | CertainTeed estimating form | Garage doors and sliders are real savings, window cutoffs are not |
| Deduct all openings, add 10 to 15% waste | Common contractor practice, e.g. Perfect Exteriors (a James Hardie installer) | Waste is separate and depends on complexity |
The logic of not deducting is that every window creates cutoffs: the piece under the sill is notched, the piece over the head is notched, and the short pieces beside the window often cannot be used anywhere else. A small window may create nearly as much scrap as its own area. A 16 ft garage door does not work that way. The courses above it are full-length pieces, and 112 SF of wall you do not side is 112 SF of product you do not buy. That is why CertainTeed deducts the large openings and leaves the small ones in.
A useful house rule: deduct any single opening larger than about 30 SF at full or half its area, and leave standard windows and entry doors in. Whatever rule you pick, record all openings on the takeoff anyway, sized, because the trim and flashing takeoff runs off their perimeters.
Rounding
ABTCO rounds each dimension up to the next 3 inches and the final total up to the next whole square. Rounding each face up to a whole square separately, as the installer in the ContractorTalk thread did, adds up to half a square per face on average. On a house with ten faces, that is five squares of material nobody needed. Round once, at the end.
Converting Squares to Pieces by Product
The conversion from area to pieces is one formula for every lap product:
Coverage per piece (SF) = piece length (ft) x exposure (in) / 12
Pieces per square = 100 / coverage per piece
Exposure is the face that shows after the lap. It is not the nominal width. A nominal 8-1/4 inch fiber cement plank lapped the minimum 1-1/4 inches shows 7 inches. Always use the exposure the drawings or spec call for, because a product installed at a tighter exposure than its standard (to match an existing house, or to land full courses under a window) takes more pieces.
Vinyl
Vinyl profiles are named for their exposure. Double 4 means two 4 inch courses on one panel, so each panel shows 8 inches.
| Profile | Panel length | Coverage per panel | Pieces per square | Carton |
|---|---|---|---|---|
| Double 4 | 12 ft 6 in | 12.5 x 8 / 12 = 8.33 SF | 12 | 24 panels = 2 squares |
| Dutch lap 4-1/2 | 12 ft 1 in | about 9.1 SF | 11 | 22 panels = 2 squares |
| Double 5 / Dutch lap 5 | 12 ft | 12 x 10 / 12 = 10 SF | 10 | 20 panels = 2 squares |
The carton contents above are from supplier listings (Winfield Supply and ALSCO). Ply Gem's estimating guide gives the same pieces-per-square figures, plus 17 panels per square for 7 inch board and batten vertical siding. Check the carton on the product you are actually buying, since panel lengths vary by line.
Fiber Cement
James Hardie's installation guide lists HardiePlank lap siding in 12 ft lengths, nominal widths from 5-1/4 to 12 inches, and exposures from 4 to 10-3/4 inches, with a minimum 1-1/4 inch lap.
| Plank | Exposure | Coverage per 12 ft plank | Pieces per square |
|---|---|---|---|
| 6-1/4 in | 5 in | 5.0 SF | 20 |
| 7-1/4 in | 6 in | 6.0 SF | 17 (16.7) |
| 8-1/4 in | 7 in | 7.0 SF | 15 (14.3) |
| 9-1/4 in | 8 in | 8.0 SF | 13 (12.5) |
| 12 in | 10-3/4 in | 10.75 SF | 10 (9.3) |
The numbers in parentheses are the no-waste arithmetic. Published charts vary a little in how they round: a Curtis Lumber dealer chart lists 143 pieces of 8-1/4 inch per 1,000 SF, which is 14.3 per square, while a Minnesota Hardie installer's table rounds the same plank to 15 per square. Keep the unrounded number in the takeoff and round once at the order.
LP SmartSide and Engineered Wood
LP's coverage guide lists its Precision lap in 16 ft lengths, so the pieces per square drop:
| LP lap size | Reveal | Pieces per 100 SF | Pieces per 1,000 SF |
|---|---|---|---|
| 6 in | 4-7/8 in | 16 | 154 |
| 8 in | 6-7/8 in | 11 | 110 |
| 12 in | 10-7/8 in | 7 | 69 |
Check the arithmetic: 16 ft x 6.875 in / 12 = 9.17 SF per piece, and 1,000 / 9.17 = 109, which the chart rounds to 110. Longer pieces also mean fewer butt joints, which affects the joint flashing count below.
Wood Lap Siding
Wood siding is sold by the lineal foot or the board foot, so the Western Wood Products Association publishes factors you multiply by the wall area:
| Bevel siding, nominal | Exposed face | Lineal foot factor | Board foot factor |
|---|---|---|---|
| 6 in | 4-1/2 in | 2.67 | 1.33 |
| 8 in | 6-1/4 in | 1.92 | 1.28 |
| 10 in | 8-1/4 in | 1.45 | 1.21 |
The lineal factor is just 12 divided by the exposed face. WWPA says to add 10 percent for trim and waste to the square footage before applying the factor, and notes the factors do not apply to diagonal installations. So 1,000 SF of 8 inch bevel is 1,100 x 1.92 = 2,112 lineal feet.
Shakes and Shingles
Sidewall shakes and shingles are bought by the bundle, and coverage depends on the exposure you lay them at and whether they go on single-course or double-course. Get the bundle coverage at your specified exposure from the manufacturer or the Cedar Shake and Shingle Bureau's tables, which dealer catalogs reprint. A small change in exposure moves the bundle count a lot, so never carry a roof bundle coverage over to a sidewall.
Trim and Accessories by the Linear Foot
Trim and accessories are where siding takeoffs go short. Every piece is a linear foot measurement off a specific line on the elevation. Here is where each one comes from, using CertainTeed's measuring instructions for vinyl.
| Accessory | Where to measure |
|---|---|
| Starter strip | Along the base of every wall where siding begins, including above any wainscot or step in the foundation |
| J-channel | Around windows and doors, under eaves, along gable rakes, where a wall meets a roof, and anywhere siding needs a finished edge |
| Outside corner posts | The length of every outside corner |
| Inside corner posts | The length of every inside corner (or double the length as J-channel if the installer uses two Js instead of a post) |
| Undersill / utility trim | Under every window, above doors, and along the top course below the soffit wherever the top of a panel gets cut |
| Window and door casing or lineals | The perimeter of each opening, when the spec calls for wide casing instead of J |
| Soffit receiver (F-channel or J) | Along the wall under every eave, and around porch ceilings |
| Fascia and soffit | Separate area and linear takeoffs: eave length x soffit depth, plus rakes |
For fiber cement and engineered wood the list changes names but not structure: starter strip ripped from plank, corner boards, window and door trim, frieze board at the top of the wall, band boards at floor lines, and Z-flashing above every horizontal trim piece and band board.
Measure, Then Check Against Factors
Ply Gem publishes accessory factors per square of siding that are useful as a sanity check, not a substitute for measuring:
| Accessory | Pieces per square of siding (Ply Gem) |
|---|---|
| Starter strip | 0.8 |
| J-channel | 2.0 |
| Outside corner post | 0.2 |
| Utility trim | 0.5 |
| Inside corner post | 0.1 |
| Finish trim (12 ft) | 2 |
| Soffit channel | 0.8 |
Ply Gem is explicit that these are rules of thumb and that architectural complexity, window and door count, and the crew's cutting habits all move the real numbers. That is the right way to use them: measure the linear feet, then multiply your squares by these factors. If your J-channel count comes out a lot lower than 2 pieces per square on a house with many windows, you probably missed a line.
Counting Corners
Corners are counted by the piece more than by the foot. A corner post is one piece per corner as long as the post is longer than the wall is tall; a two-story corner needs two posts and a splice. So record both the linear feet and the number of corners, with the tallest corner height, and let the stick length on your supplier's sheet decide the count.
Openings Drive the Trim
For each window, the J-channel or casing is its full perimeter: 2 x (width + height). For a door, it is the head plus two sides. For a garage door, the same. Undersill trim goes under each window and wherever panels get cut along the top. Twelve 3 by 5 windows are only 180 SF of wall, but they are 192 LF of J-channel or casing, 36 LF of undersill, 12 head flashings, and 12 sill pans. The opening count is the real driver of accessory cost and of labor, which is why a flat gross-area price tends to lose money on houses with a lot of glass.
(This is the part Tectonic handles when you drop in the plan set: it pulls wall areas, opening sizes and the trim linear footage off the elevations as a materials list. Do the elevation breakdown by hand at least once so you know what a sane J-channel number looks like before you trust any tool's.)
Housewrap, Flashing, Fasteners and Clearances
The siding is the rain screen. The water-resistive barrier and flashing behind it are what keep the wall dry, and they are required by code whether or not the drawings detail them.
Water-Resistive Barrier
IRC Section R703.2 requires a water-resistive barrier behind the siding on exterior walls. No. 15 felt complying with ASTM D226 Type 1 qualifies, as do barriers tested to ASTM E2556 and other approved materials installed per their manufacturer's instructions. Where felt is used, older IRC text and some state amendments (Minnesota's, for one) spell out laps of at least 2 inches at horizontal joints and 6 inches at vertical joints. Housewrap follows its own manufacturer's lap rules.
Take off housewrap on the gross wall area including the gables, because it is installed over the openings and cut in. DuPont lists Tyvek HomeWrap roll sizes of 9 x 100 ft (900 SF), 9 x 150 ft (1,350 SF) and 10 x 150 ft (1,500 SF), among others. Laps, the gable triangles and cutting around openings eat into the roll, so a house with 1,492 SF of gross wall is a two-roll house on 9 x 150 rolls, not a 1.1-roll house. Add the tape and cap fasteners the wrap maker specifies.
Flashing
IRC R703.4 lists where flashing is required: the tops of exterior wall openings, penetrations, intersections of walls with roofs and horizontal surfaces, and more, including at the point where a sloped roof stops against a sided wall (the kick-out, referenced to R903.2.1). Sill pans are in the list too: Minnesota's adopted R703.4.1, for example, requires pan flashing per the window maker's instructions, or at every sill where none are given. Count them:
- -Head flashing at every window and door head.
- -Sill pans at every window and door, or the flashing tape and membrane to build them.
- -Kick-out flashing at every place a roof eave dies into a sided wall. One per roof-to-wall termination.
- -Step flashing and J or diverter along every sloped roof-to-wall line (the VSI vinyl manual shows a diverter or kick-out at the bottom of the run).
- -Z-flashing above every horizontal trim board, band board and material transition.
- -Butt joint flashing for fiber cement lap siding. James Hardie's installation guide says one of three joint treatments is required by code (it cites IRC R703.10.2): joint flashing, which it recommends, caulking, or an H-jointer. Its recommended flashing is 6 inches wide and overlaps the course below by 1 inch.
- -Penetration blocks for every hose bib, light, vent, meter and dryer vent. Vinyl makers use split mounting blocks and trim rings.
Butt joints are worth counting, not guessing. On a 44 ft wall with 12 ft planks, every course has at least 3 joints. A 9 ft wall at a 7 inch exposure is about 16 courses, so that wall alone has up to 48 butt joints, each needing a flashing piece, less wherever openings interrupt a course. Hardie's guide also calls for butt joints to land on studs and to be staggered at least two stud bays apart on 16 inch framing, which is part of why fiber cement waste runs higher than vinyl on long walls. Longer products like 16 ft engineered wood cut the joint count by about a quarter.
Fasteners
IRC Table R703.3(1) sets minimum fasteners by product and substrate. For vinyl it calls for a 0.120 inch shank nail with a 0.313 inch head (or a 16 gauge staple with a 3/8 to 1/2 inch crown) at 16 inches on center, over wood structural panel sheathing into studs. For fiber cement lap siding into wood sheathing and studs, it is a 6d common nail (2 in x 0.113 in). Manufacturer instructions add to that: the VSI manual requires nails to penetrate framing or nailable sheathing a total of 1-1/4 inches, and LP's instructions call for 1-1/2 inches into studs or sheathing and studs.
For quantity, Ply Gem's rule of thumb is about 1/3 pound of nails per square of vinyl, or more precisely square feet x 0.005 for aluminum nails and square feet x 0.01 for roofing nails, staples or screws, in pounds. Coil nails for fiber cement come from the gun supplier's count per box and the fastener spacing in the installation guide.
Clearances and Gaps That Change Quantities
These look like installation details, but they change what you measure:
| Rule | Source |
|---|---|
| 6 in minimum between siding and finish grade | James Hardie and LP SmartSide installation instructions |
| 2 in minimum between fiber cement and a roof surface | James Hardie installation guide |
| 1 in minimum between LP siding and roofs, patios and porch surfaces | LP SmartSide coverage guide |
| 1/4 in gap at vinyl posts and channels, 3/8 in below 40 F | VSI installation manual |
| 1/8 in gap between fiber cement and trim, then caulk | James Hardie installation guide |
| 3/16 in gap at LP siding joints and trim | LP SmartSide coverage guide |
The grade clearance means your wall height starts at 6 inches above finish grade, not at the ground, and on a sloped lot the bottom course steps up the hill. The roof clearance means every roof-to-wall line gets a gap, a flashing detail and usually a receiver. None of these add much area, but all of them add trim and labor.
Worked Example: One House, Three Methods, Four Products
Here is a simple single-story house carried through every line so you can see where the methods split.
The House
- -44 ft x 28 ft footprint, 9 ft walls measured from 6 in above grade to the soffit
- -Gable ends on the two 28 ft walls, 6 in 12 roof, so each gable is 28 ft wide and 7 ft tall at the peak
- -12 windows at 3 x 5 ft
- -2 entry doors at 3 x 6.8 ft
- -1 slider at 6 x 6.8 ft
- -1 garage door at 16 x 7 ft on a long wall
- -4 outside corners, no inside corners, gables sided in the same lap as the walls
Step 1: Areas
| Facet | Arithmetic | Area |
|---|---|---|
| Long walls | 2 x 44 x 9 | 792 SF |
| Gable end walls (to eave) | 2 x 28 x 9 | 504 SF |
| Gables (true area) | 2 x 28 x 7 / 2 | 196 SF |
| Gross sided area | 1,492 SF | |
| Windows | 12 x 15 | 180 SF |
| Entry doors | 2 x 20.4 | 40.8 SF |
| Slider | 6 x 6.8 | 40.8 SF |
| Garage door | 16 x 7 | 112 SF |
| Total openings | 373.6 SF | |
| Net sided area | 1,492 - 373.6 | 1,118.4 SF |
Openings are 25 percent of the gross area on this house, and a quarter of that is the garage door.
Step 2: Three Methods
| Method | Arithmetic | Order area | Squares |
|---|---|---|---|
| A. ABTCO: no deductions, gables at 0.75 x W x H, no waste | 1,296 + 2 x (28 x 7 x 0.75) | 1,590 SF | 15.9, order 16 |
| B. CertainTeed: gables at (H + 1) x W/2, large openings at 50% | 1,296 + 2 x (8 x 14) - 0.5 x (112 + 40.8) | 1,443.6 SF | 14.4, order 15 |
| C. Net area plus waste | 1,118.4 x 1.10 or x 1.15 | 1,230 to 1,286 SF | 12.3 to 12.9, order 13 |
The spread from method C to method A is about 3 squares on a 15 square house, roughly 24 percent. Method A is the safest order for someone who will not go back to the yard. Method C is the tightest, and it depends on the waste factor being right for the geometry. Method B sits between them and is a good default for a simple house.
For this house, a reasonable order is method C at 15 percent waste (the gables and 16 openings justify the higher end), which is 1,286 SF, or 12.9 squares.
Step 3: Pieces by Product
| Product | Coverage per piece | Pieces for 1,286 SF (C) | Pieces for 1,590 SF (A) |
|---|---|---|---|
| Vinyl Double 4, 12 ft 6 in | 8.33 SF | 155 panels (7 cartons of 24) | 191 panels (8 cartons) |
| Vinyl Double 5, 12 ft | 10.0 SF | 129 panels (7 cartons of 20) | 159 panels (8 cartons) |
| Fiber cement 8-1/4 in at 7 in, 12 ft | 7.0 SF | 184 planks | 228 planks |
| LP 8 in at 6-7/8 in, 16 ft | 9.17 SF | 141 pieces | 174 pieces |
Note that 155 Double 4 panels is 6.5 cartons, which rounds up to 7 cartons, or 14 squares bought. Carton rounding added most of another square on its own. That is the last place overbuying hides, and it is worth asking whether your yard will break a carton.
Step 4: Accessories
| Line | Arithmetic | Quantity |
|---|---|---|
| Starter strip | Perimeter 2 x (44 + 28) = 144 LF, less door and garage widths (3 + 3 + 6 + 16) | 116 LF |
| J-channel or casing, windows | 12 x 2 x (3 + 5) | 192 LF |
| J-channel or casing, doors | Entries 2 x (3 + 13.6), slider 6 + 13.6, garage 16 + 14 | 82.8 LF |
| J-channel, gable rakes | Rake length = square root of (14 squared + 7 squared) = 15.65 ft, x 4 | 62.6 LF |
| J-channel total | 337.4 LF | |
| Undersill, windows | 12 x 3 | 36 LF |
| Undersill or receiver, eaves | 2 x 44 | 88 LF |
| Outside corners | 4 corners x 9 ft | 36 LF, 4 posts |
| Housewrap | 1,492 SF gross on 1,350 SF rolls | 2 rolls |
| Head flashing and sill pans | 12 windows, 2 entry doors, slider, garage door (head only) | 16 heads, 15 sills |
| Nails (roofing nails, Ply Gem rule) | 1,286 x 0.01 | about 13 lb |
Step 5: Cross-Check With the Factors
At 13 squares, Ply Gem's factors predict 13 x 2.0 = 26 pieces of J-channel and 13 x 0.8 = 10.4 pieces of starter. The measured 337 LF of J is about 27 to 29 pieces depending on stick length, and the 116 LF of starter is about 10 pieces. The factors and the measurement agree within a few pieces, which is what you want to see. If they had been 30 percent apart, you would go back and look for a missed wall or a missed opening type.
What Changes for Fiber Cement
Swap to 8-1/4 inch fiber cement and the trim list changes: corner boards instead of posts, window and door trim boards instead of J, a frieze board along the 88 LF of eave, Z-flashing over every window and door head (16 locations), and starter ripped from plank. Butt joint flashing becomes a real line: on the two 44 ft walls, about 16 courses x 3 joints each, less courses interrupted by openings, puts the count near 80 to 90 before the 28 ft walls and gables are added. Add sealant for cut ends where they land at joints, and primer or touch-up for any cut edges the manufacturer requires to be sealed.
Siding Scope Checklist: What Gets Missed
Most siding takeoffs are right on the panels and wrong on everything around them. Run this list before you price.
Surfaces
- -Every elevation, including the back. Rear elevations are often drawn with less detail, and bump-outs, chimney chases and bay windows hide there.
- -Gables above porch roofs and garage roofs, which are not on the main walls' plan outline.
- -Dormer cheeks and faces, with their own rake trim.
- -Chimney chases framed and sided, including the cap flashing or crown.
- -Walls above lower roofs, which start at the roof line plus clearance, not at grade.
- -Soffit and fascia, as separate area and linear takeoffs: eave length x soffit depth for vented soffit, rake length x overhang for solid, plus porch ceilings.
- -Mixed materials. Stone wainscot, shake gables, board and batten accent walls. Each is its own takeoff and each transition gets flashing and trim.
Trim and Accessories
- -Starter, corners (outside and inside), J or casing, undersill, frieze, band boards, rake trim.
- -Z-flashing above every horizontal trim piece.
- -Mounting blocks and trim rings at every light, outlet, hose bib, vent and meter.
- -Kick-out flashing at every roof-to-wall termination.
- -Butt joint flashing on fiber cement.
- -Sealant for trim joints and cut ends, and touch-up paint for prefinished products.
Tear-Off and Existing Conditions (Re-Side Jobs)
- -Removal and disposal of the old siding, often priced per square, plus the dumpster.
- -Rotted sheathing and trim found after tear-off. Carry an allowance by the sheet or the linear foot and say so in the proposal.
- -Existing window flashing. Installing new siding over a badly flashed window repeats the problem. Decide up front whether you are re-flashing openings.
- -Lead-safe work practices on pre-1978 homes where painted surfaces get disturbed.
- -Furring or shimming for wavy walls, and build-outs at windows when you add insulated siding or foam, so trim still sits proud.
Job Conditions
- -Staging and access: two-story walls, steep grades, walls over lower roofs. The material takeoff is the same. The labor and equipment are not.
- -Cold-weather rules: vinyl gaps go from 1/4 in to 3/8 in below 40 F per the VSI manual, and caulks and paints have minimum application temperatures.
- -Silica dust control for cutting fiber cement. Hardie's guide notes that OSHA treats a circular saw under 8 inches with a dust collection system per the manufacturer's instructions as keeping exposure below the permissible limit.
- -Color and texture matching on partial re-sides. A texture repeat or a discontinued color can turn a patch into a whole elevation.
Two Habits Worth Building
First, keep your wall squares, material squares and billing squares separate in the takeoff and label which is which. When the product changes from vinyl to fiber cement, the wall squares do not move, only the conversion does. When an installer's square count disagrees with yours, you can see in one line whether it is a measuring rule or a missed wall.
Second, track your actual waste by house type. Squares ordered, squares installed, and cartons or planks returned. After a dozen jobs you will know whether your crew runs 8 percent on a simple ranch or 18 percent on a cut-up two-story with gables, and that number is worth more than any published rule.
Key Takeaways
- 1.A siding takeoff measures each wall, gable and dormer facet in square feet, converts to squares of 100 SF, then to cartons or pieces using the product's exposure, and takes off trim and accessories separately by linear foot.
- 2.Published gable rules range from CertainTeed's center height plus 1 ft times half the width (about 14 percent over the true triangle on a 28 ft, 6 in 12 gable) to ABTCO's 0.75 times width times height (50 percent over).
- 3.ABTCO's estimating guide does not deduct doors and windows at all, while CertainTeed's form deducts only large openings like garage doors and sliders at half their area, which is why the same house can come out 12 to 16 squares.
- 4.Coverage per lap piece is length times exposure divided by 12, so a 12 ft fiber cement plank at a 7 inch exposure covers 7 SF and takes about 14.3 pieces per square with no waste.
- 5.Ply Gem's accessory factors of about 2 pieces of J-channel and 0.8 pieces of starter per square of vinyl are a good cross-check on a measured takeoff, not a replacement for it.
- 6.IRC R703.2 requires a water-resistive barrier on all exterior walls and R703.4 requires flashing at openings, penetrations and roof-to-wall intersections, so housewrap, sill pans, head flashing and kick-outs belong in every siding takeoff.