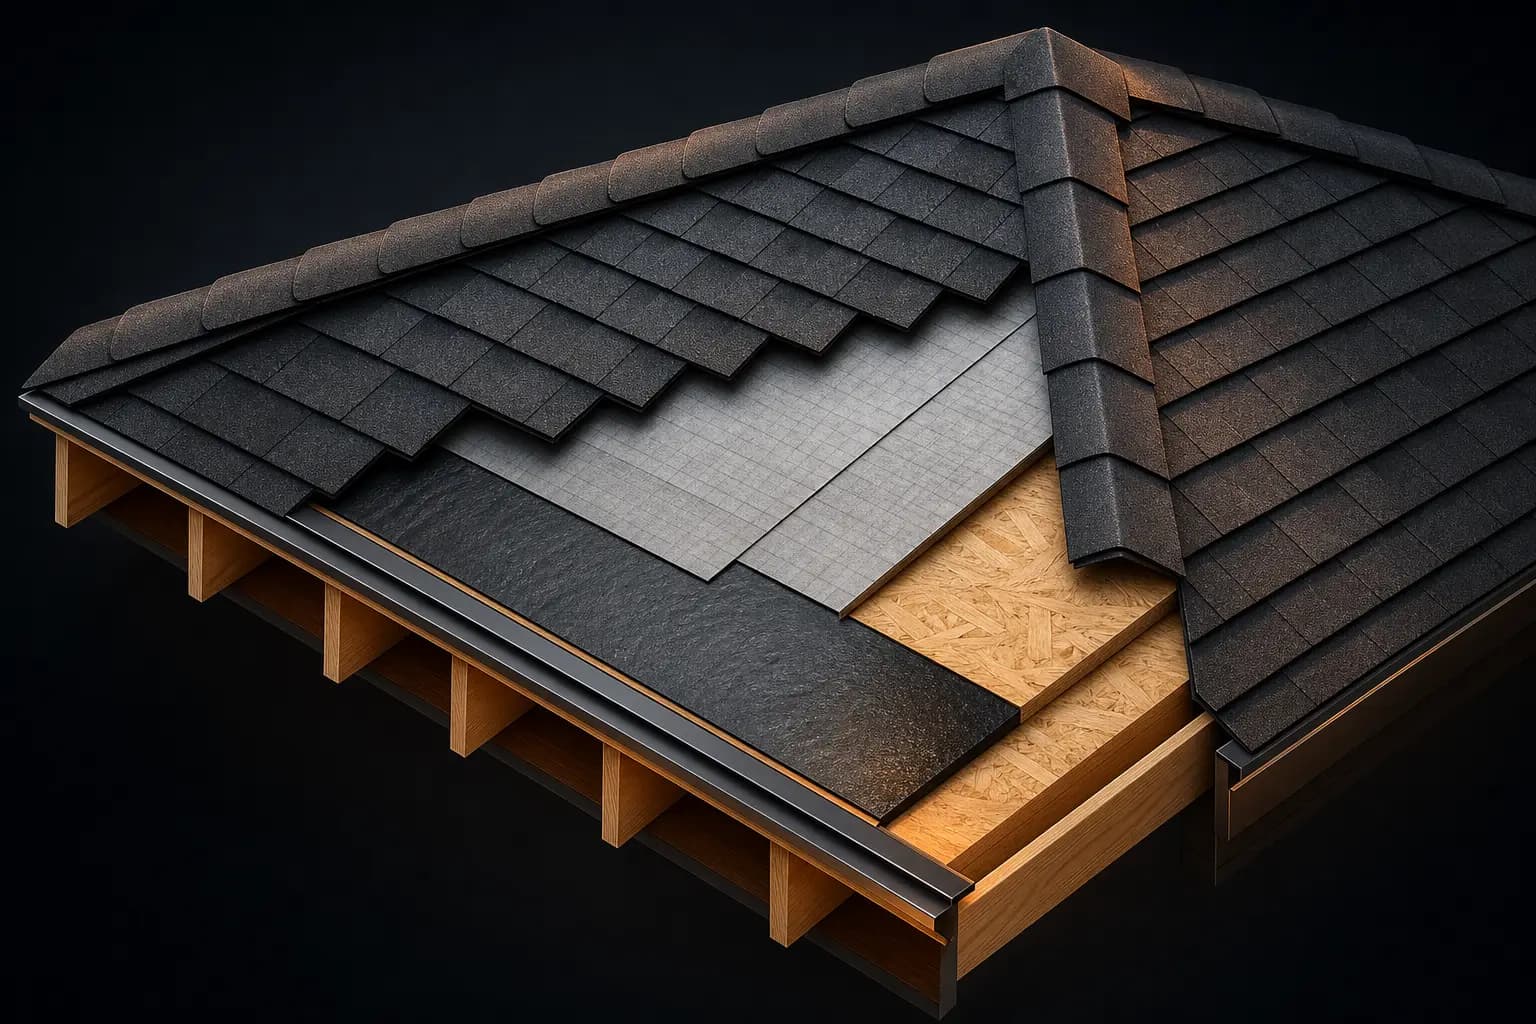
How to Do a Roofing Takeoff
A roofing takeoff converts a roof into two kinds of quantity: area, counted in squares, and perimeter, counted in linear feet. Measure the footprint of each roof plane, multiply by the pitch factor for that plane's slope to get true sloped area, add the planes together, divide by 100 to get squares, then add a waste factor. That is the whole area calculation:
Squares = (Footprint area SF x Pitch factor) / 100 x (1 + waste factor)
One roofing square equals 100 square feet of roof surface. A 2,000 SF footprint under a 6/12 roof is 2,000 x 1.118 = 2,236 SF of actual roof, which is 22.4 squares before waste, and about 26 squares after a 15 percent add on a hip roof. The single most expensive mistake in roofing estimating is dividing the 2,000 by 100 and ordering 20 squares. You just came up short by roughly a quarter of the job.
The second half of the takeoff is the part that separates estimators from guessers. Roofing is not one line item, it is a field quantity plus a perimeter quantity, and they are bought in different units:
- -Field shingles in squares, then converted to bundles
- -Underlayment in squares, by the roll
- -Ice barrier membrane in linear feet of eave and valley, by the roll
- -Starter strip in linear feet of eave and rake
- -Hip and ridge cap in linear feet of hip and ridge
- -Drip edge in linear feet of eave and rake, by the 10 ft piece
- -Valley metal in linear feet of valley
- -Penetration flashing in count: pipe boots, vent caps, skylight kits
- -Fasteners in pounds
Keep those on separate lines. An estimator who prices roofing as one blended number per square loses the ability to bid an unusual roof, because perimeter does not scale with area. Two roofs can both be 26 squares: a plain rectangular gable, and a cut-up roof with five dormers, four valleys and 90 feet of hip. The second one carries roughly double the accessory package and significantly more cut waste, and a per-square blended price will underbid it every time.
Takeoff and Estimate Are Two Different Documents
A takeoff answers how much material the job needs. An estimate answers what the job costs. The takeoff produces quantities and becomes your purchase order; the estimate applies pricing, labor, overhead and margin to those quantities. Keep them separate. When a job goes sideways you need to know whether you measured wrong or priced wrong, and a blended spreadsheet hides which one it was.
Measure the Covered Surface, Not the Building
The measurement boundary for roof covering runs over the outer covered surface: from the outer fascia face at the eave, out to the rake edge including the gable overhang, up to the ridge. It is not the exterior wall line. A house with 12 in overhangs all the way around picks up roughly two feet in each direction, and on a 28 by 44 body that is about 150 extra square feet of roof before the pitch factor is even applied. Estimators who take the footprint off the foundation plan instead of the roof plan lose that area every single time.
Pitch Factor: Footprint to Real Roof Area
A roof plane is the hypotenuse of a right triangle. The plan view only shows you the horizontal leg, which is the shadow the roof casts on the ground. The pitch factor, also called the slope factor or pitch multiplier, converts that shadow into the real surface:
Pitch factor = square root of (1 + (rise / 12) squared)
For a 6/12 roof: the square root of (1 + 0.25) is the square root of 1.25, which is 1.118. That means a 6/12 roof has about 11.8 percent more surface than its footprint. At 12/12 it is 41.4 percent more. You do not need to run the formula on every job, but you should know it exists, because it tells you the factor is pure geometry rather than a fudge number somebody made up.
| Pitch | Angle | Pitch factor | Hip / valley factor | Extra area vs footprint |
|---|---|---|---|---|
| 3/12 | 14.0 deg | 1.031 | 1.436 | 3.1 percent |
| 4/12 | 18.4 deg | 1.054 | 1.453 | 5.4 percent |
| 5/12 | 22.6 deg | 1.083 | 1.474 | 8.3 percent |
| 6/12 | 26.6 deg | 1.118 | 1.500 | 11.8 percent |
| 7/12 | 30.3 deg | 1.158 | 1.530 | 15.8 percent |
| 8/12 | 33.7 deg | 1.202 | 1.563 | 20.2 percent |
| 9/12 | 36.9 deg | 1.250 | 1.601 | 25.0 percent |
| 10/12 | 39.8 deg | 1.302 | 1.641 | 30.2 percent |
| 11/12 | 42.5 deg | 1.357 | 1.685 | 35.7 percent |
| 12/12 | 45.0 deg | 1.414 | 1.732 | 41.4 percent |
The Hip and Valley Factor Is a Different Number
This is the one that catches people. Hips and valleys run diagonally across the plan, so they climb in two directions at once and need their own multiplier:
Hip / valley factor = square root of (rise squared + 288) / 12
At 6/12 that is the square root of 324 divided by 12, which comes out to exactly 1.500. Apply it to the horizontal run measured perpendicular from the eave, not to the diagonal you scale off the plan. On a hip roof over a 30 ft wide body, each hip has a 15 ft perpendicular run, so the true hip length is 15 x 1.5 = 22.5 ft. Use the field pitch factor of 1.118 there instead and you order 17 ft of hip cap for a 22.5 ft hip, which is short on every one of the four hips.
Why the Footprint Shortcut Works at All
On a roof where every plane runs the same pitch, the horizontal projections of all the planes tile the footprint exactly with no gaps and no overlaps. That is why footprint times factor gives the right answer on a simple gable or a uniform hip. The shortcut breaks the moment pitches differ. A 4/12 porch roof tacked onto an 8/12 main body has to be measured and multiplied on its own, then added in. Same for a low-slope shed dormer, a flat entry canopy, or a garage the builder framed shallower than the house.
Three Ways to Get the Pitch
- -Off the drawings. The roof plan or the building sections call the pitch out with a slope triangle. This is the most reliable source and the one to use when you have a plan set.
- -From the attic. Hold a level against the underside of a rafter, mark 12 in along the level, and measure down to the rafter. That vertical number is your rise. No ladder, no fall exposure.
- -On the roof. A pitch gauge or a framing square against the slope. Only worth doing if you are already up there and it is dry.
Do not eyeball it. The difference between a 6/12 and an 8/12 on a 2,000 SF footprint is 168 SF of roof, which is most of two squares, and two squares is the difference between a comfortable order and a second trip.
Measuring the Planes and the Perimeter
Work plane by plane. Every roof, no matter how cut up, breaks down into rectangles, triangles and trapezoids, and each one gets measured, multiplied by its own pitch factor, and written on its own line. Resist the urge to take one overall number for a complicated roof. The plane-by-plane sheet is what lets you check your work later and what lets somebody else check it for you.
For each plane record: the plan dimensions, the pitch, the factor you applied, and the resulting sloped area. Then total the column.
Then Walk the Perimeter Separately
Area gives you shingles and underlayment. Everything else comes off the perimeter, and the perimeter is five distinct measurements that behave differently. Get them on their own lines:
| Line | What it is | What it buys |
|---|---|---|
| Eave | The bottom horizontal edge, at the gutter | Drip edge, starter, ice barrier, gutter apron |
| Rake | The sloped edge at a gable end | Drip edge, starter (the bleeder strip) |
| Ridge | The top horizontal edge where two planes meet | Ridge cap, ridge vent |
| Hip | The outside diagonal where two planes meet | Hip cap |
| Valley | The inside diagonal where two planes meet | Valley metal, ice barrier, extra cut waste |
Two geometry facts worth memorizing, because they catch errors before they cost money. A true hip roof has no rakes at all, so if your hip roof takeoff shows rake footage, you either have a gable somewhere you did not notice or you double-counted. And on a hip roof with equal pitch all around, the ridge length equals the building length minus the building width. A 30 by 46 hip has a 16 ft ridge. If you scaled 30 ft of ridge off the plan, your scale is wrong.
Reading It Off the Plans
On a commercial set the roof plan lives in the A-2xx sheet series, and roofing sits in CSI Division 07: section 07 31 for shingles and tile, 07 41 for metal panels, and the 07 50 group for low-slope membrane. Read the roof plan and the spec section together. The plan gives you geometry; the spec gives you the assembly, and the assembly is what decides how many layers of underlayment, what class of fastener, and whether the manufacturer's warranty requires accessories from the same product line.
Scale calibration is the failure point on digital plans. Before you measure anything, find a known dimension on the sheet, measure it with your tool, and confirm it reads back correctly. PDFs get printed to a different page size, scaled to fit, and re-saved often enough that the title block scale is not always the scale you have in front of you. Calibrate on a long dimension rather than a short one, because a small error over 4 ft becomes a large error over 60 ft.
(This is the part Tectonic automates: it reads the roof plan out of the PDF and returns the plane areas and the perimeter footage as quantities, then applies your markup. Do one roof by hand with a scale ruler first anyway. You cannot sanity-check a tool's output on a cut-up roof if you have never built the plane-by-plane sheet yourself.)
When There Are No Plans
Reroof work usually has no drawings at all. Then you have three options: measure the footprint from the ground with a tape or a wheel and apply a pitch you took from the attic, measure the planes directly on a walkable roof, or buy an aerial measurement report. The ground method is fine for a simple gable. It degrades fast on anything with dormers, multiple wings, or a roof you cannot see all of from the yard. Whatever you use, write down which method produced the number, because a ground-and-attic estimate deserves a fatter contingency than a set of measured planes.
Worked Example: A Full Hip-and-Gable Takeoff
Here is the whole process on one house, with every number shown. Tear-off and reroof, architectural shingles, one existing layer.
The roof: main body is a hip roof, 28 ft by 44 ft to the wall line, with 12 in overhangs all around. An attached garage runs off one side as a gable ell, 22 ft by 24 ft to the wall line, same 12 in overhangs, tying into the main roof at its inboard end. Everything is 6/12.
Step 1. Footprint to the drip edge, not the wall line.
- -Main body: 28 + 2 = 30 ft, and 44 + 2 = 46 ft, so 30 x 46 = 1,380 SF
- -Garage: 22 + 2 = 24 ft, and 24 + 2 = 26 ft, so 24 x 26 = 624 SF
Step 2. Apply the pitch factor. Both planes are 6/12, so both get 1.118.
- -Main body: 1,380 x 1.118 = 1,542.8 SF
- -Garage: 624 x 1.118 = 697.6 SF
- -Total sloped area: 1,542.8 + 697.6 = 2,240.4 SF, or 22.40 squares
Note what would have happened without the factor: 2,004 SF, or 20.04 squares. The pitch alone is worth 2.4 squares on a modest house, and that is 7 bundles.
Step 3. Waste. Hip roof with two valleys where the garage ties in, so 15 percent.
- -22.40 x 1.15 = 25.76, round up to 26 squares
- -Bundles at 3 per square: 26 x 3 = 78 bundles
Suppliers do not sell partial squares, so always round up to the whole square. The garage roof overlaps the main roof slightly at the tie-in, which means this total is a shade conservative. That is fine. Waste factors are supposed to absorb small conservative errors, not small optimistic ones.
Step 4. The perimeter, line by line.
Main body hip roof, 30 x 46:
- -Ridge = 46 - 30 = 16 LF
- -Hips: four of them, each with a 15 ft perpendicular run, at the 1.5 hip factor. 15 x 1.5 = 22.5 ft each, so 4 x 22.5 = 90 LF
- -Eave = the full perimeter, 2 x (30 + 46) = 152 LF
- -Rake = 0 LF, because a true hip has none
Garage gable ell, 24 x 26:
- -Ridge = 26 LF
- -Eaves = 2 x 26 = 52 LF
- -Rakes: only the outboard gable end has them. Each rake spans a 12 ft run at the 1.118 field factor, so 12 x 1.118 = 13.4 ft, and 2 x 13.4 = 27 LF
- -Valleys: two, where the garage meets the main roof. Each has a 12 ft perpendicular run at the 1.5 hip and valley factor, so 12 x 1.5 = 18 ft each, and 2 x 18 = 36 LF
Totals to carry forward: eave 204 LF, rake 27 LF, ridge 42 LF, hip 90 LF, valley 36 LF.
Step 5. Turn the perimeter into a material list.
| Item | Driver | Math | Order |
|---|---|---|---|
| Architectural shingles | 26 squares | 26 x 3 bundles | 78 bundles |
| Synthetic underlayment | 22.4 sq field | at about 10 sq per roll | 3 rolls |
| Ice barrier | 204 LF eave x 2 courses + 36 LF valley = 444 LF | at 65 LF per 36 in x 65 ft roll | 7 rolls |
| Starter strip | eave 204 + rake 27 = 231 LF | at roughly 120 LF per bundle | 2 bundles |
| Hip and ridge cap | ridge 42 + hip 90 = 132 LF | at roughly 20 to 25 LF per bundle | 6 to 7 bundles |
| Drip edge | eave 204 + rake 27 = 231 LF | 10 ft pieces, lapped | 24 pieces |
| Valley metal | 36 LF | 10 ft pieces | 4 pieces |
| Roofing nails | 26 squares | about 2.5 lbs per square = 65 lbs | two 50 lb boxes |
| Pipe boots and vent caps | counted off the plan | each | count them |
Why the ice barrier is two courses at the eave. The IRC requires the ice barrier to run from the eave edge to a point at least 24 in inside the exterior wall line, in areas with a history of ice damming. On this house the membrane has to cover a 12 in overhang, cross the wall thickness, and then continue 24 in past it. That is more than a single 36 in wide course reaches, so the eave takes two. Estimators who order one course of ice and water for the eave footage are routinely half short on exactly the item the inspector looks at first. If you are outside an ice damming region this line drops to valleys only, which is 36 LF and one roll.
The check. 78 bundles, 26 squares, 132 LF of cap, 231 LF of edge metal, 444 LF of membrane. Every number traces to a measured dimension and a published coverage rate. When the supplier asks why you want seven rolls of ice and water on a 26 square roof, you have the answer.
The Accessories That Sink Bids
Field shingles are the line everybody remembers. The accessory package is where roofing bids quietly go underwater, because each item is individually small and collectively about a fifth of the material order. Every one of these coverage rates should be confirmed against the wrapper on the product you are actually buying, because they vary by manufacturer and by product line.
| Material | Typical coverage | Measured against |
|---|---|---|
| 3-tab or architectural shingles | 3 bundles per square | Field area in squares |
| Designer or luxury shingles | 4 to 5 bundles per square | Field area in squares |
| Synthetic underlayment | about 10 squares per roll | Field area in squares |
| 15 lb or 30 lb felt | about 4 or 2 squares per roll | Field area in squares |
| Ice barrier membrane | 36 in x 65 ft, about 2 squares | Eave and valley linear feet |
| Starter strip | roughly 100 to 120 LF per bundle | Eave plus rake linear feet |
| Hip and ridge cap | roughly 20 to 25 LF per bundle | Ridge plus hip linear feet |
| Drip edge | 10 ft pieces, lapped about 2 in | Eave plus rake linear feet |
| Valley metal | 10 ft pieces | Valley linear feet |
| Roofing nails | about 2.5 lbs per square at 4 nails | Field area in squares |
Starter Goes on the Rakes Too
Starter strip at the eave is standard. The piece people forget is the rake, where old-timers call it the bleeder strip. Leaving it off does not just shortchange the order, it costs you on the tear-off side of an insurance job, because the eave and rake starter courses are real material that a crew really removes and some scopes never list them.
Cap Is Not Field Shingle
You can cut hip and ridge cap out of 3-tab, and plenty of crews do. You cannot cut it out of architectural shingle, which is why dedicated hip and ridge product exists and why it gets its own line. Pricing cap as if it were field shingle understates a roof with 90 feet of hip by a meaningful amount, and cut cap on a laminated shingle can void the manufacturer's system warranty. Check what the spec or the warranty class requires before you substitute.
Fastening Changes With the Wind Zone
The IRC's prescriptive baseline is 4 nails per strip shingle. High wind zones, steep slopes, and most manufacturers' enhanced warranty requirements push that to 6, which is a 50 percent jump in your fastener line and a real change to the labor the crew will spend. The nails are cheap. Discovering at inspection that the assembly needed a 6-nail pattern is not.
Ventilation Is a Line Item, Not an Afterthought
The IRC requires net free ventilating area of 1/150 of the attic floor area, which can be reduced to 1/300 where a vapor retarder is installed on the warm-in-winter side of the ceiling, or where 40 to 50 percent of the required venting sits in the upper portion of the roof with the balance down low. What that means for your takeoff is that ridge vent competes with ridge cap for the same linear feet. If 42 LF of ridge is getting continuous ridge vent, you are buying vent for that run and cap to go over it, not cap alone. Price both.
Low Slope Is a Different Assembly Entirely
Asphalt shingles are only permitted down to a 2:12 slope, and between 2:12 and 4:12 the code calls for two layers of underlayment rather than one. Below 2:12 you are not installing shingles at all, you are installing a low-slope membrane system that is measured, specified and priced on completely different terms. A porch roof or a shed dormer drawn at 2/12 on a house that is otherwise 8/12 is not a rounding issue in your takeoff, it is a separate scope with a separate material package. Catch it on the roof plan, not on the roof.
Waste Factors by Roof Type
You never install exactly the area you measured. Starter courses get cut, cap gets cut, every valley gets cut on both sides, and the last course on each plane leaves an offcut too short to use. The waste factor covers that gap, and picking it badly is the most common way a roofing bid goes underwater.
| Roof type | Waste | Why |
|---|---|---|
| Simple gable, few penetrations | 10 percent | Long straight courses, cuts only at rakes |
| Hip roof | 15 percent | Every course into a hip is an angled cut |
| Roof with valleys | 15 percent | Valleys waste on both sides of the cut |
| Cut-up roof: dormers, multiple wings, many penetrations | 15 to 20 percent | Short runs, constant cutting, little reusable offcut |
| Steep and complex, or a pattern that has to align | 20 percent and up | Offcuts rarely land where the next course needs them |
Valleys Are the Expensive Geometry
A hip and a valley are the same length for the same run, but they do not cost the same. On a hip, the cut shingle from one plane is often the right shape to start the adjacent plane, so some of the waste comes back. On a valley, both planes run into the cut and both sides produce scrap. Treat a roof with four valleys as meaningfully more wasteful than a roof with four hips even when the linear footage matches, and do not let a takeoff tool that totals "hips and valleys" as one number hide that from you.
Tune the Number Against Your Own History
The table above is a starting point, not a law. The better source is your own job history. Pull the last six roofs you closed out, compare squares ordered against squares installed, and see where your crew actually lands. A crew that stages material well and cuts economically might run 8 percent on gables. A crew learning a new shingle line might run 18. Both are real, and the estimator who knows which one is theirs prices work the other one loses.
Round Up, and Round Up Once
Round up to the whole square at the end, after waste, not at every intermediate step. Rounding each plane up to a whole square and then adding a waste factor on top double-counts, and on a roof with eight planes it can add most of a square of phantom material. Do the arithmetic in decimals the whole way through and round exactly once, at the order.
Being Short Costs More Than Being Long
Order 10 percent over and you eat the surplus, which is real money but bounded. Come up 10 percent short and a crew stands on a hot roof while somebody drives to the supply house, and the half day of lost production usually costs more than the shingles did. Where the two errors are not symmetric, lean long. That asymmetry is the whole argument for a defensible waste factor instead of an optimistic one.
Tear-Off, Layers, and What Is Under the Shingles
On reroof work, half the scope risk is not in the new material at all. It is in what comes off and what you find underneath.
Count the Layers
Tear-off is scoped and priced by the square per layer, so a two-layer roof is not the same job as a one-layer roof at the same square count. Count them before you bid. Lift a shingle at a rake edge or check at a vent penetration where the courses are exposed. If heavy gauge edge metal makes the count impossible to verify, say so in the proposal and price the layers you can confirm with a stated unit price for each additional layer found. That is an honest way to handle an unknown, and it is far better than discovering a third layer of cedar shake on the morning of the tear-off with a fixed price already signed.
Layers also drive disposal, which is its own line: dumpster size, haul count, tipping fees, and the magnet sweep at the end. Disposal volume scales with layers, not with squares.
Budget the Deck
You cannot see the sheathing until the shingles are off. The professional way to handle that is a decking allowance carried as a stated unit price: a per-sheet rate for replacement plywood or OSB, with a not-to-exceed count above which the owner approves more. Writing "decking replacement as needed" with no number in it means you either eat it or fight about it. A unit price means you have already agreed how it gets handled before anybody is standing on a bare roof.
Watch for the specific conditions that predict bad deck: valleys and eaves with old failed flashing, roofs with a history of ice damming, plank decking on older homes where a shingle upgrade may require an overlay, and any area where the existing roof shows sag from the ground.
Note the Steep and the Tall
A roof over 8/12 stops being walkable, and a two-story or three-story roof changes staging, fall protection setup, and how material gets to the deck. Neither of those changes your material takeoff by a single bundle, but both of them change the job, and the takeoff sheet is the right place to flag them so nobody prices a 12/12 third-story roof off the same assumptions as a ranch. Write the pitch and the story count at the top of the sheet.
On Insurance Work, Match Their Language
Restoration work usually arrives as an estimate written in insurance software, with quantities exported as an ESX file. The friction is almost always the same two things: whether the scope carries the starter courses at eave and rake as removable material, and whether the square count in the carrier's report is net or gross. Reconcile line by line against your own takeoff before you agree to a number. The report's geometry is usually solid. The line items and the waste treatment are what you negotiate.
What Gets Missed
A checklist to run before the order goes in. Most of these are a single forgotten line, and each one has ended a job's margin at some point.
Geometry
- -Footprint taken to the wall line instead of the drip edge, losing the overhang on all four sides
- -Pitch factor never applied, or applied at the wrong pitch
- -One pitch factor applied to a roof that has more than one pitch on it: porches, dormers, a shallower garage
- -Hip and valley lengths multiplied by the field pitch factor instead of the hip and valley factor
- -Rake footage showing up on a true hip roof, which means something was miscounted
- -Scale never calibrated on the PDF before measuring
The Material List
- -Hip and ridge cap forgotten entirely, or priced as field shingle
- -Starter counted at the eave but not the rake
- -One course of ice barrier ordered where the code's 24 in inside the wall line needs two
- -Drip edge counted on the eave but not the rake
- -Valley metal missing on a roof with open valleys
- -Pipe boots, vent caps and skylight flashing kits never counted off the plan
- -Ridge vent and ridge cap competing for the same linear feet, with only one of them bought
The Scope Around It
- -Layer count not verified, so tear-off is priced for one layer on a two-layer roof
- -No decking allowance, or an allowance with no unit price attached to it
- -Disposal, dumpster and tipping fees left out
- -Low-slope sections under 2:12 silently priced as shingle roof
- -Fastening pattern assumed at 4 nails where the wind zone or the warranty requires 6
- -Permit and inspection requirements not checked against the local amendments
The Habit That Prevents Most of This
Build the takeoff as a plane-by-plane sheet plus a five-line perimeter summary, every time, even on a roof simple enough to do in your head. The format is the control. When the areas live in one column with their pitch factors beside them, and eave, rake, ridge, hip and valley each have their own total, the missing line item is visible: a roof with 36 LF of valley and no valley metal on the order sheet is an error you can see. A roof priced as "26 squares, call it X" is an error nobody can see until the truck shows up.
(Tectonic will pull those plane areas and perimeter lengths off the PDF and carry your overhead and profit markup through to the bid total. It is the same sheet, filled in faster. It does not decide your waste factor for you, and it should not: that number belongs to your crew and your job history, and you are the only one who knows it.)
Key Takeaways
- 1.One roofing square equals 100 square feet of roof surface area, which is not the same as 100 square feet of building footprint.
- 2.Pitch factor equals the square root of one plus the rise over twelve squared, so a 6/12 roof has 11.8 percent more surface than its footprint and a 12/12 roof has 41.4 percent more.
- 3.Hips and valleys run diagonally and need their own multiplier, the square root of rise squared plus 288 all over 12, which is exactly 1.5 at a 6/12 pitch.
- 4.Waste runs about 10 percent on a simple gable, 15 percent on a hip roof or a roof with valleys, and 15 to 20 percent on a cut-up roof with dormers.
- 5.The IRC permits asphalt shingles down to a 2:12 slope and requires two layers of underlayment between 2:12 and 4:12, so any lower-slope section is a separate assembly with a separate material package.
- 6.The IRC ice barrier must reach at least 24 inches inside the exterior wall line, which on a house with overhangs usually takes two courses of 36 inch membrane at the eave rather than one.